Final Day!!

This morning we came in a little earlier and started to paint instantly. We split the jobs so that a couple of us were attaching the beading while the rest of us started to paint the door. There was a lot of discussion around what colours should and would be used, but it all seemed to go smoothly.

By the end of the day we had managed to paint the door and give it a coat of varnish, but it is still to be put up on campus.

Cirque De La Scenic!

This morning we set up a tent outside (hence the title) and, while Ellie played us some circus tunes, we began covering the sides of the frame with tile adhesive and filling the holes and gaps in the barley twists in order to make sure that the final piece would be as prepared for outside weather as it could be.

We had to set up heaters and heat guns inside the tent (which we had created to keep in the heat) to make sure that everything dried nicely because the weather outside was far too cold. We then mixed the light blue and pink colours and began to add them to the door frame and all of its add-ons in order to begin the painting process.
We had to stop this for a while so that we could have our meeting and discuss how the project had gone, which was good, however we were hoping to have been finished by then, which clearly we were not. I am not sure whether this was due to bad time management or if we had just misjudged how much work we had to do in the time we had been given.

We then began to fit the panels into place as we decided that it made sense to do that first so that Conor could fit the beading in before we started painting it all properly.


Photo Update

Photo Update!


I finished off the effects on my panels this morning as seen above. They are, in my opinion, pretty great, although they look quite different to everyone elses panels, but I guess that is part of the individuality aspect of the project.

I also spent a lot of the day sanding down the rosettes with Meggie so that they could be fitted to the door frame that Conor had built.

Painting

I started off  by painting both of my panels with the dark layer first making sure to cover it nicely. I then decided to try something different; I started one of them off with the pale pink layer over the dark, and the other with the blue layer over the dark. However, I then followed the rest of my process quite similarly and was very happy with the results.


In the early afternoon (in between my layers of paint) we had a visit from the Bentley Silicone company who spoke to us and demonstrated different kinds of silicone and what they are best used for, as well as bringing along a lot of movie props for us to have a look at.


Paint Effects

Today Sophie came in to look at painting effects with us.
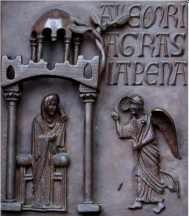
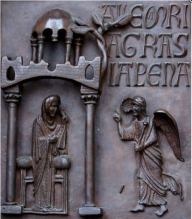
The original door is made from bronze and so we need to be able to replicate that kind of effect.

Looking at different photos of the door was the best way to find the right kinds of references because it allowed us to see how the colours may have changed and darkened in certain areas over time.

This is the process of colours that I used in order to create the effect required:

Fixing Problems

I have spent most of today using a chisel to chip off the little bubbles that were sitting on the surface of my cast. I was very cautious at first and worried about the chisel causing too much damage to my piece but it turns out that it actually worked quite perfectly and only pulled off the bubbles, leaving all the details and figure nicely in tact.

I also had time today to cast my second panel, but after watching some of the other methods used by everyone else I decided that the jesmonite worked best for me.

Casting

I removed the silicone and fibreglass cases from the original plasticine model this morning and spent some time making sure I removed all of the excess plasticine from the mould. This revealed a lot of air bubbles within my silicone mould (Karen believes that this is because the silicone we are using isn’t great quality as Meggie and Lola had the same kind of issues) but this problem cant really be solved until after I have casted the jesmonite, at which point I should be able to sand down my piece.

The next step was to prepare the the base of my mould before casting.
First of all I had to rub bees honey wax around the edge of the fibreglass case (2 layers works best) and then an application of the Blue PVA Gloss Release Agent (again, 2 layers is best).


The correct mixture measurements for the Jesmonite is 1 part liquids:2.5 part powders. The mixture needs to be mixed thoroughly before it can be poured into the mould. I used a wooden modelling tool to make sure that I pushed all of the mixture into all of the spaces and then left it to dry for half an hour (40 mins ish).
Once dry I scored the back of the block in order to make sure that the next lot of mixture would join with the dry areas. I then mixed up another (smaller) batch of the jesmonite and prepared a sheet of fibreglass.
I worked out that the best way to apply the fibreglass was to spread a thin layer of the Jesmonite mixture on the surface of the dried block and then lay the fibreglass sheeting over the top of it before applying the rest of the mix with a paintbrush, and again, leave to dry.


I was able to remove my first cast by the end of the day and am very happy with how it turned out. The only problems that I have come across are the bubbles on the surface and one of the leaves on the structure had snapped (not sure why).

Modelling Mary

Photo Update!

screen-shot-2016-12-15-at-15-56-52

Surprisingly it didn’t take me very long to sort out the angels face; all I needed to do was make sure that the chin came out more and the rest of it all seemed to just fall into place (I think I had just been looking at it for too long the other day)

This all made it a lot easier to work on Marys face quite quickly and gave me plenty of time to build up her body, clothing and then start on the finer details.
In order to get the detailing right on the clothing I used the tip of a pen (the kind that you click to use) because the little circular hole made the perfect indents to match the image of the original.

I have now finished with the modelling process and will be able to start the casting process.

Making an Angel

Photo Update!

screen-shot-2016-12-15-at-15-56-52

I have spent most of today working on the angel figure. This has actually taken a surprising amount of time as I kept removing the face and attempting to recreate it; I could not seem to get the right kind of shape to it. I believe that this is because of the wing that protrudes from behind it. I can’t seem to get the right roundness to the face either. It has been driving me a little bit crazy so I have decided to leave it for today and come back to it tomorrow.
On the bright side, I have figures out the perfect way to get the creases within the clothing to look realistic; by making very thin sausage-like rolls, lying them in position and then using a small flat-ended modelling tool to smooth one side of it out over the space where the fabric would fall.